Click here for part 1
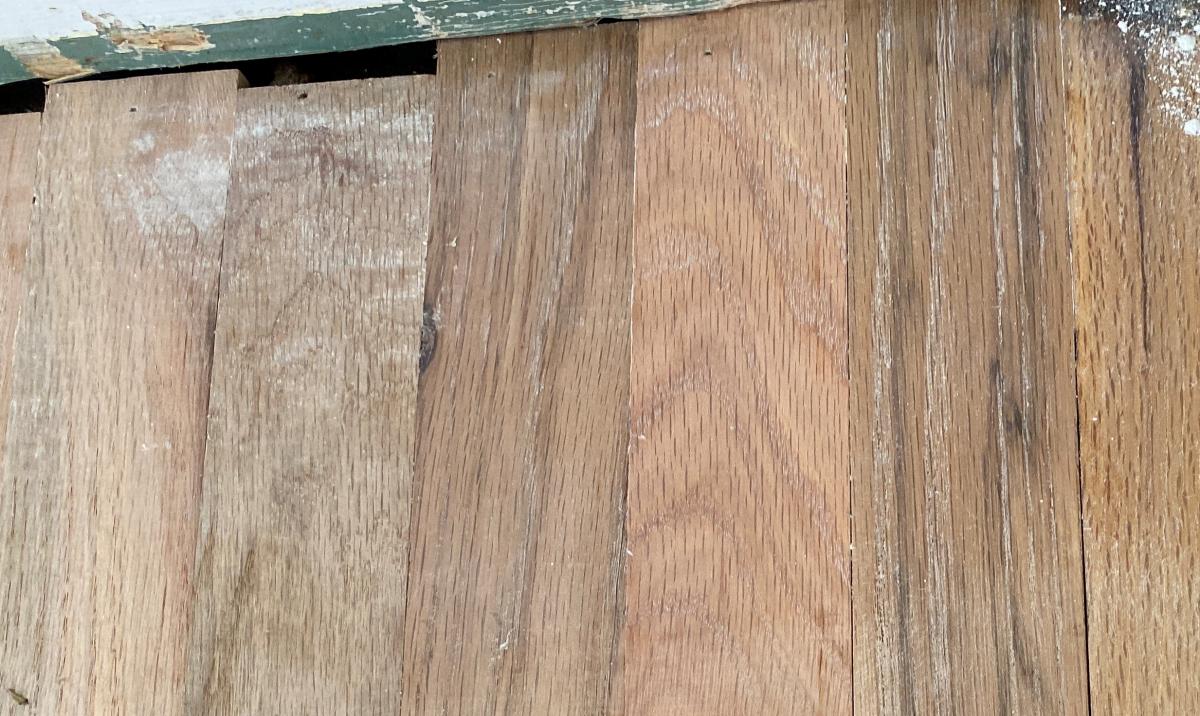
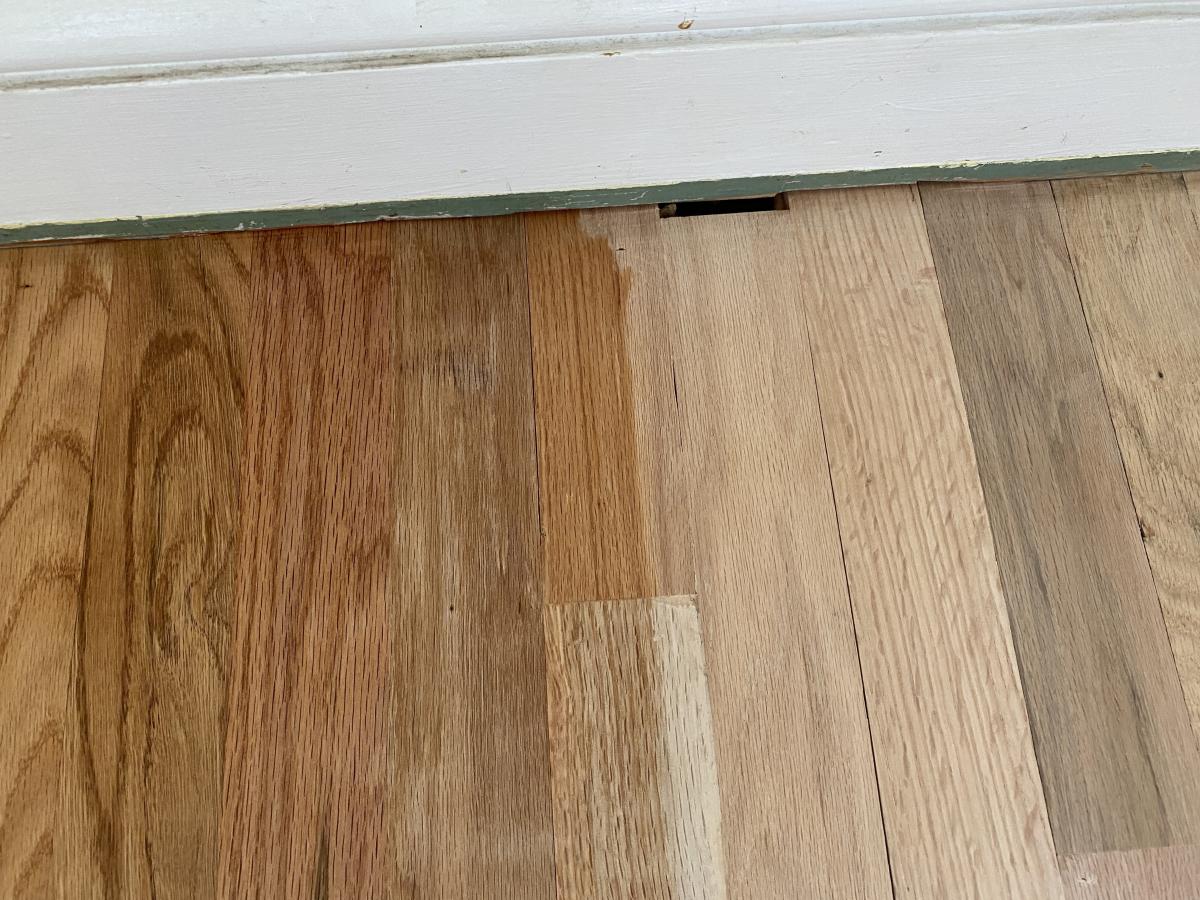
My brother, his partner, their baby, my parents, and my partner and I went back and forth on what finish to put on my brother’s new oak floors. The problem was that there was a pretty big difference between the old and new flooring, and among the new flooring itself - a wide variety of colors. We tested a variety of Osmo Stains and Pro Colors, Vermont Natural, and Real Milk Paint finishes and most of them seemed to highlight not minimize the difference in flooring.
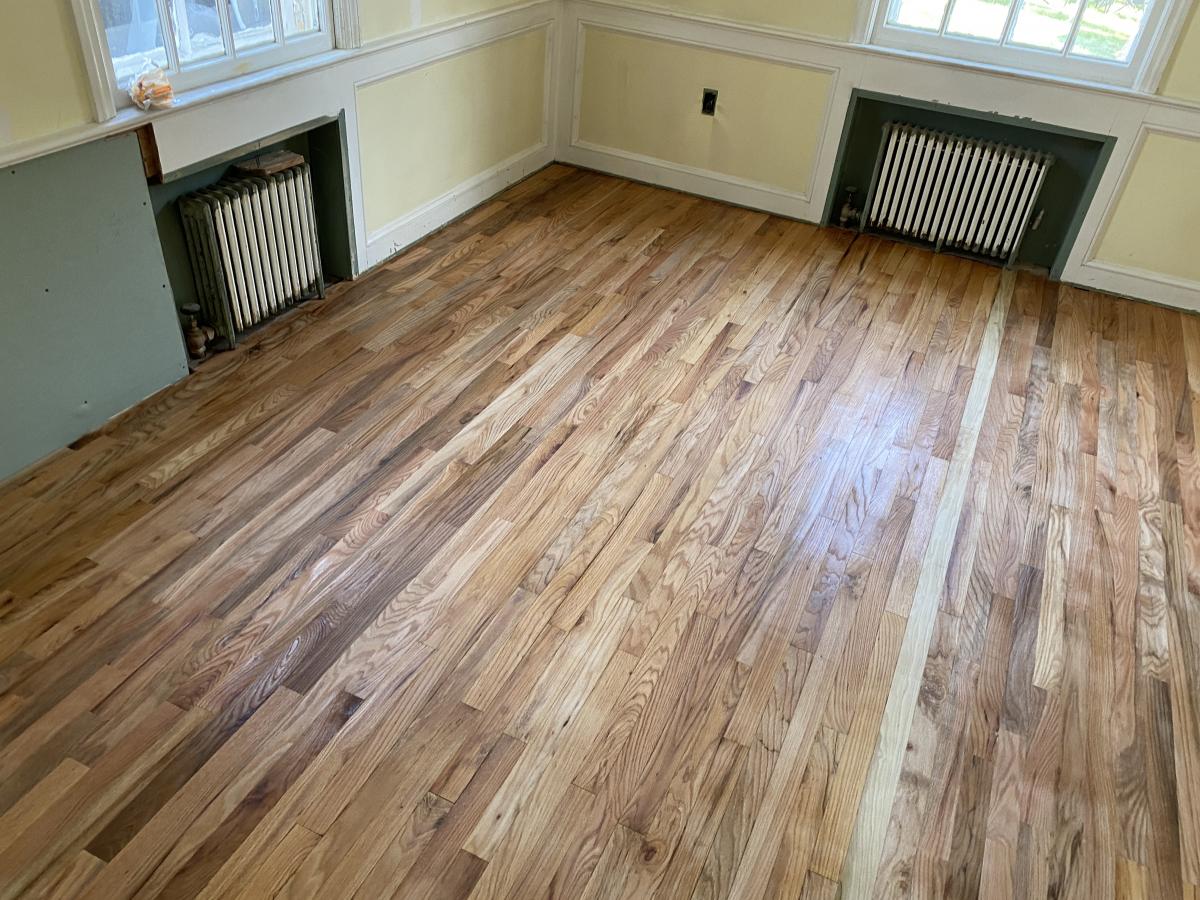
Our answer came from an old friend I reached out to to ask for help, he asked how the floor looked with Osmo Polyx (Satin 3054) only on it - the top coat we were going to use but which didn’t color the wood at all. Not seeing how it would help we tried it and were happily surprised to find while it didn’t hide the differences, it actually tied the floor together and definitely made it look better, in addition to protecting it. Additionally, he said that over time the look of the floor boards would even out with use and sunlight. We gave it a shot and loved the look.
With that decided we had to prep and put the finish down! Prepping floors to finish is relatively straightforward in general with the caveat that as with everything in life, every floor is different.
After sanding you have to clean the heck out of the floor - wiping with a tack cloth or microfiber mop. The goal is to get everything you can off the floor, and there different ways to do so. Everything that is on the floor (sawdust, dirt, regular dust, car keys, bugs) will still be there forever if it is there when you apply the finish. A good heavy vacuuming helps as well. We went with a good swiffering and a once-over with our Festool Mini vacuum and floor nozzle. If you haven’t checked out the wide range of individual nozzles, brushes, cleaning sets, and other accessories for the Festool dust extractors, then what are you doing with your life?! Not relevant to the floors is my favorite accessory - the oh-so-magic Festool wings. Check them out and thank me later.
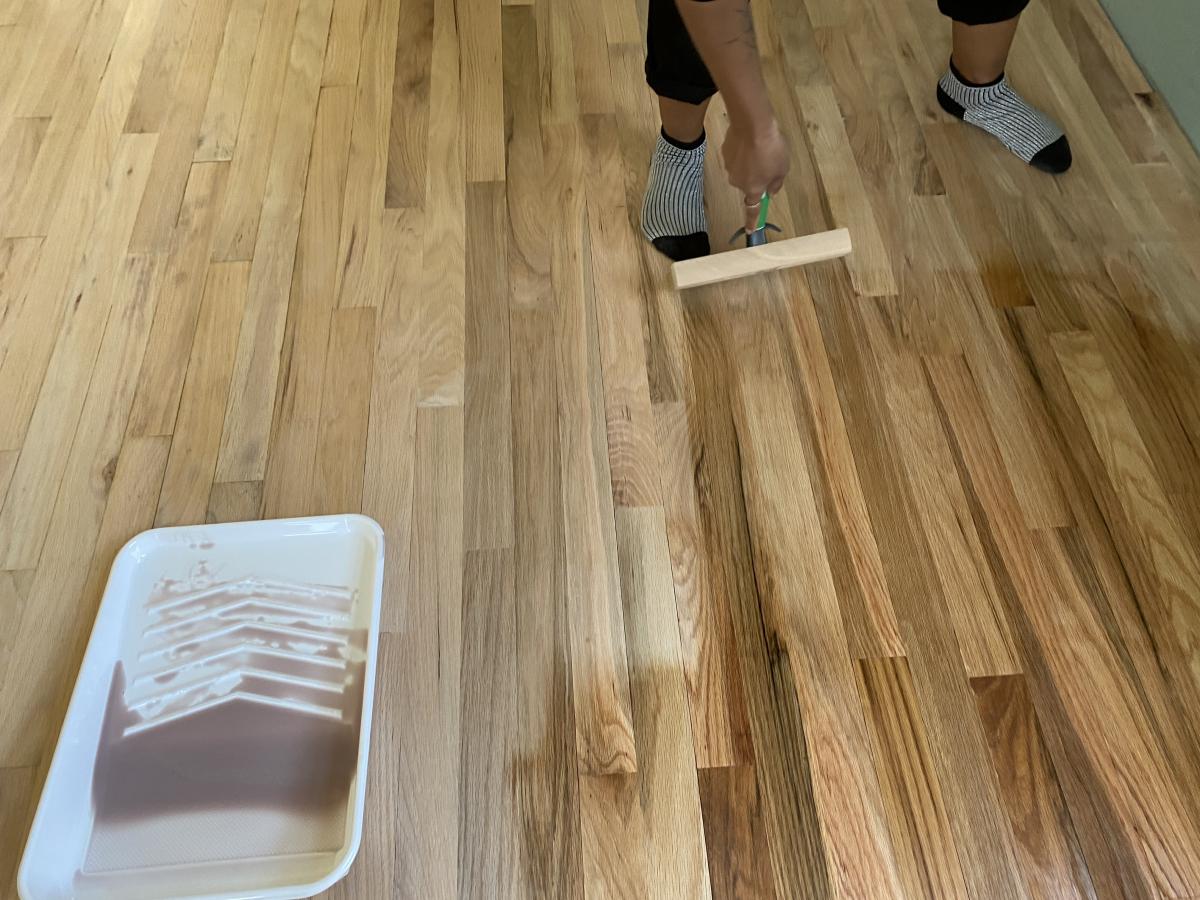
Anywho, once the floor was as clean as we felt good with, we were ready to Osmo things up. Osmo is a unique finish in a number of ways. Critical here is that you must apply Osmo in thin even coats - you never glop a bunch on, let it soak in, and pick up the excess. Thin, even layers. While I have gotten pretty good with this on furniture and small items, I have never applied it to floors. How to make sure it is even on such a large surface with a variety of different flooring boards and ever-changing light? Luckily it wasn’t as hard as we thought it might be.
And thus it begins.
We applied the Osmo with their flooring brushes which come in 220 and 400 mm. They are pricey but well worth it. Pouring a 1/4" or so of finish into a standard roller tray we were able to get the perfect amount of finish every time. Dip the brush, wipe any excess as needed, a good steady pull on the floor and once over again became the perfect recipe for us and we made quick work of the dining room’s first coat. For what it’s worth, the floors were done entirely by folks with zero experience.
In retrospect we should have sprung for the telescoping handle from Osmo, or at least the small adaptor that allows you to use a regular broom handle with the flooring brush.
That said, we weren’t without snafus. At one point we tried applying with a roller as well - now Osmo makes rollers specifically for their finishes, but we accidentally used a regular paint roller - and didn’t realize our mistake until a good amount of the living room’s second coat was already on - way too thick and tacky. We let it sit for a while, resanded it down a bit, and started again with the coat.
There are a range of opinions on how long to let the floors sit and cure before you start moving furniture in etc. We didn’t have the luxury of waiting weeks as some folks recommend, but did the best we could, relying on the fact that should it get scuffed or messed up another way, Osmo Polyx is pretty easy to touch up in spots.
Updates to follow as we follow the floor though moving in and living there…
A dining room floor good enough to eat off of!
Join the conversation
05/20/2021 Randy Hermann
Thanks for sharing your experience, always nice to learn from real-world "DIY". The floor looks great in the pictures.
05/20/2021 Joe Samalin
Thanks Randy and I hope it stays that way for a while!
05/24/2021 Spencer Strange
Getting ready to poly my own floor, but I am not sure I am satisfied with the 100 grit finish. That is the highest grit that I can find for my rented sanding drum. What grit did you sand to?
05/31/2021 Joe
Spencer - you shouldn’t have to go too much higher. For us since we lost so much time with the orbital sander we went to 80 or 100, I forget which. You should be able to get higher grits with an orbital which is meant for finish sanding.


 Joel's Blog
 Built-It Blog
 Video Roundup
 Classes & Events
 Work Magazine